Showing posts with label tutorials. Show all posts

12.30.2011

new years eve diy's

I've been busy crafting over the last couple of days to help a friend get ready for her new years eve bash. I came up with a few different party hat styles that I wanted to share with you here.
The first was quick and easy and used dollar store cardboard party hats, vinyl stickers, silver spray paint, and colorful wire garland- all of which I already had at home. I simply placed the stickers "2012" on the center of the hat, painted silver, and hot glued some garland around the bottom. How easy is that? Initially I had wanted to take off the stickers and let the colorful hat pattern show through but after painted I loved how the silver numbers looked so much that I kept them.

The second hat style took a bit longer but was equally easy. For this one you'll need card stock, scissors or an x-acto knife, spray adhesive, glitter, hot glue gun, tape, elastic string and some sparkly tinsel. I took one of the leftover pre-bought hats and took it apart to make a template (I will add it here later for your use!) Here's what I did next (click photo for a larger view):
  1. Trace your pre-bought part hat onto the card stock of your choice. If you are using a 2-sided paper make sure to trace on the back- mine was shimmery on one side. OR you can download my pdf and print the party hat image directly onto the back of your cardstock.
  2. Cut out hat shape. The "x's" are where you will tape your elastic onto the inside of the hat so don't cut those.
  3. Fold (roll) the hat into shape and slide the tabs on the left side into the opening on the right. I then applied some tape to the inside to hold it together and then added a few dots of hot glue under the seams.
  4. Apply spray mount to the very top of your hat for an ombre glitter look or all over for more sparkle- should probably do this outside.
  5. Sprinkle on your glitter and shake excess off onto a piece of paper.
  6. Use your hot glue gun to add tinsel around the bottom of your hat.
  7. Party and enjoy!
I also made some sparkly drink stirs (seen at top) with the leftover tinsel by simply wrapping small sections of it to bamboo skewers and securing with a dot of hot glue. I hope your New Years Eve is full of fun and sparkle!

12.29.2011

gift diy: monogrammed ipad sleeve

I wanted to share with you guys one of the diy gifts I made for some friends and family. I adjusted the ipad measurements to also fit a kindle for each of my sisters- super easy and everyone loved them! I somewhat followed the instructions from this tutorial but simplified materials and added the initial stencil for each of the recipients. Here's what you'll need:
  • Adhesive-backed felt sheets (mine were 9"x12" packs from Wal-Mart)
  • Lightweight material for inside lining
  • Rotary cutter or scissors
  • Cutting mat and ruler
  • Matching thread
  • Letter stencils
  • Gold (or any color) paint and stencil brush
  • Sewing machine
Here's what you do (following the photos clockwise):
  • Cut all of your pieces to size (leaving the inside lining material slightly smaller). Your felt and lining should be cut to about two inches larger (length and width) than the device you are planning to fit into it. I simply googled the dimensions for each of mine.
  • Pull the adhesive paper off the back of the felt BUT it works best for sewing if you leave a small strip of paper on the two sides and bottom. This way the adhesive won't stick to your sewing machine- unfortunately I learned this the hard way.
  • Place lining fabric face up on the back of the felt and smooth down to the adhesive. Leave about an inch of room at the top for folding over for a seam. Now fold that seam over.
  • Repeat this with your other piece of felt and lining to create the back of your sleeve.
I didn't get photos of the actual sewing process, which is probably best due to my severe lack of skills in sewing anything except paper garlands. Here is what you'll do for the sewing portion:
  • Sew each of the top seams over.
  • Place your front and back pieces together FELT to FELT side. This will make your bag inside out. Sew the two sides and bottom together.
  • Flip this inside out and viola- your sleeve is made! Pull the corners out square, cut any loose strings, and flatten (or iron if your patient).
Lastly I added a stencil monogram onto the front of each for a personalized touch. I used a gold paint that is supposed to mimic gold foil but you could really use any craft or fabric paint. (The photos below are from a different set of bags so the colors/fabric are different)
  • Tape your stencil down so it won't move.
  • Use your stencil brush to apply paint and allow to dry before trying to move the stencil.
  • Admire your work!
You can easily make one of these in under an hour or quite a few in an afternoon. My loved ones really liked theirs so I will probably be making more in the future. Have fun crafting!

6.24.2011

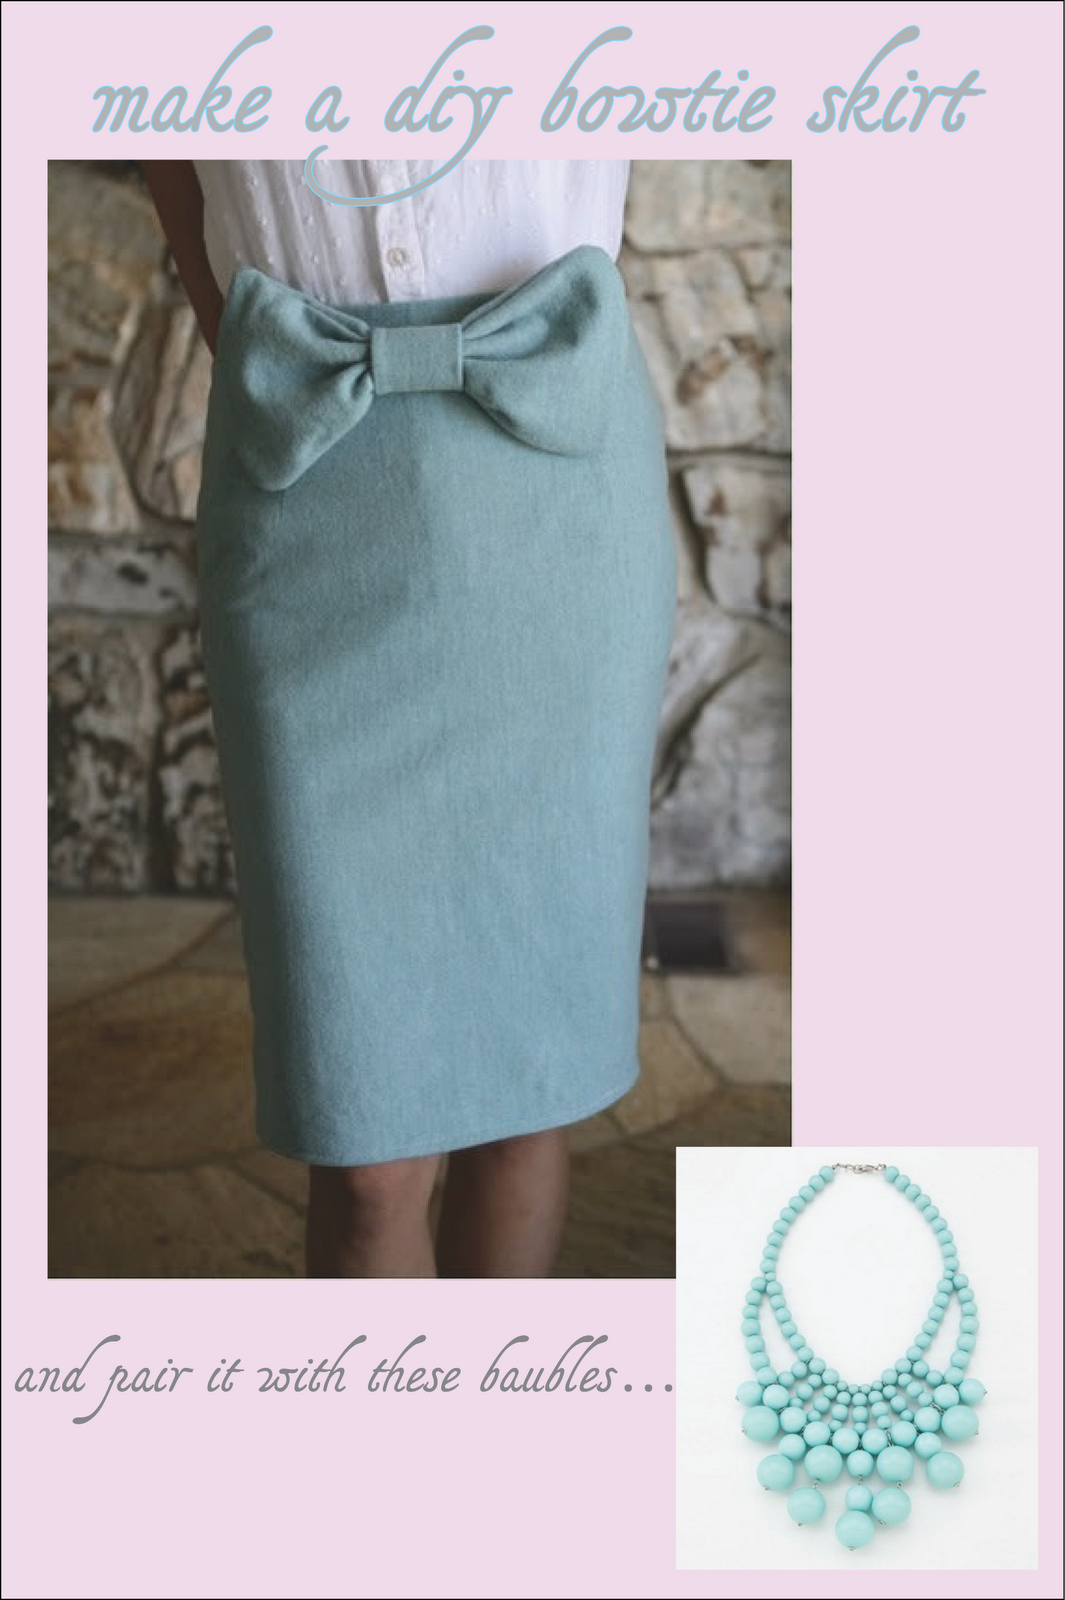
bowtie skirt

Ok before we head out for the weekend I just had to share this adorable diy bowtie skirt by the lovely Sarah of Welcome to the Good life. She has the cutest family, clothes, and tutorials. Such an easy project with a really sophisticated end result. And I love the idea of it paired with huge turquoise necklace by oliphant. So, so pretty!

6.23.2011

heart & craft d.i.y. tutorial!

Excited to be sharing my first craft tutorial over on PrettySouthern. It is a d.i.y. confetti card and includes 3 free printable card templates that I designed especially for this project. Hope you can get your craft on!
**click above links to print your own hooray cards!